Saving a 3D terrain model to DB3D database |


|
|
The task of saving the three-dimensional terrain model is started in the main menu of the «Navigator 3D» window by choosing the «File - Save as ...» item. A three-dimensional terrain model consists of two parts: a terrain model and three-dimensional models of objects of a map. The terrain model is created from the set of spatial data included in the project. Tiles of a terrain model are built from elevation data (matrixes, tin- and mtd-models), and textures stretched over it are cut from images of digital maps and raster data (aero- and satellite images). All obtained data are saved in the form of a separately described terrain model of the area in the database of the DB3D format.
Three-dimensional models of objects of a map are created on the basis of typical 3D views assigned to objects in the classifier editor. A typical 3D view of an object is described using a template consisting of one or several parts that are drawn according to the metric of the object and form its volumetric image (for example, a socle, walls of a building , its roof, etc.). Each part of the template contains a description of the geometry of a three-dimensional surface, drawn by metric, and its visual characteristics. These characteristics include color, material, surface texture, and a way of repetition of a texture horizontally and vertically. Three-dimensional models of map objects are saved into a database in the DB3D format by tiles. If the metric of an object crosses several tiles, then the object is cut into pieces. When exporting to the database, both the description of the geometry of the model and its visual characteristics (color, material, texture) are saved. Loading into the database is available for all 3D types of objects, except for titles and animated signs.
DB3D format is intended for storing and displaying pyramids of three-dimensional tiles packed together with tables of metadata in SQLite format. It provides fast tile-based output of spatial information in accordance with the requested scale and territory. The format is intended for storing data in pyramids of 3D tiles of various types, for example, GoogleMapsCompatible (matrix compatible with Google data in projection EPSG:3857), GoogleCrs84Quad (matrix compatible with Google data in projection EPSG:4326). The current saving of the model goes by default with the pyramid type GoogleCrs84Quad. Level of scale detailing of data and the coverage area are not limited. A range of scales recommended for work is from 10-12 to 22 levels of the tile pyramid.
The export of a three-dimensional terrain model is made to the specified scale levels, with a tile size selected from the standard ones. When exporting three-dimensional models of objects, the presence of 3D views of the nearest, middle and far plan is taken into account. At the maximum level of the pyramid of tiles (on a large scale), the 3D view of the nearest plan (the most detailed) is used to build models, at lower levels (on a small scale) - 3D views of the middle and far plan (with a simplified representation of objects).
The raster coverage for the elevation model is saved in the JPEG format, and the textures of the 3D object models are saved in the PNG format (for the ability to load and display translucent textures).
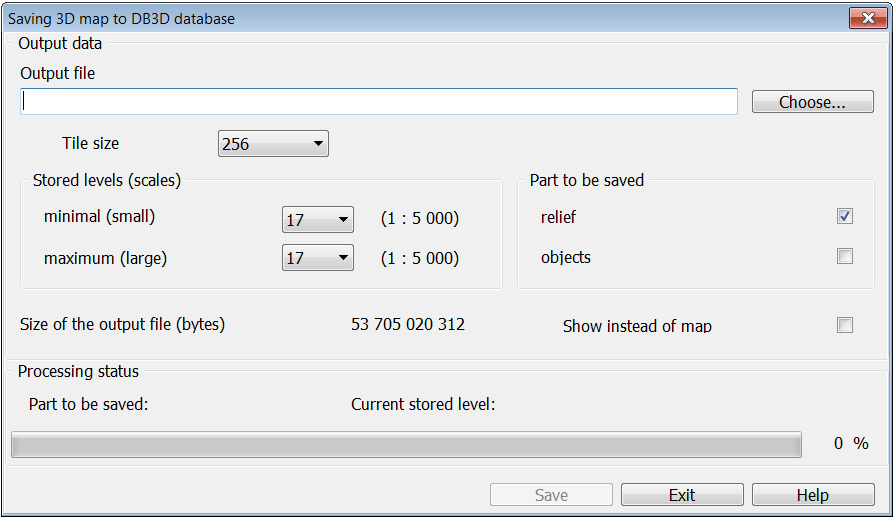
For saving it is necessary to execute the following actions:
1) Press the button «Choose...» and specify the output DB3D file, if it already exists, or specify the name of the new DB3D file, then it will be created. After that, the «Save» button becomes active.
2) Set the size of formed tiles in pixels. If an existing database was selected for saving the model, then the tile size will be automatically changed onto the one previously specified in the database.
3) Set the limiting scale levels for data saving. Levels are selected from the list of levels of 3D-tiles pyramid. In brackets the scale approximately corresponding to the chosen level is displayed. At a maximum level (in a large scale) a more detailed model is created. At a minimum level (in small scale) - less detailed accordingly. It is preferable to use the levels from 10 to 19 for saving the model.
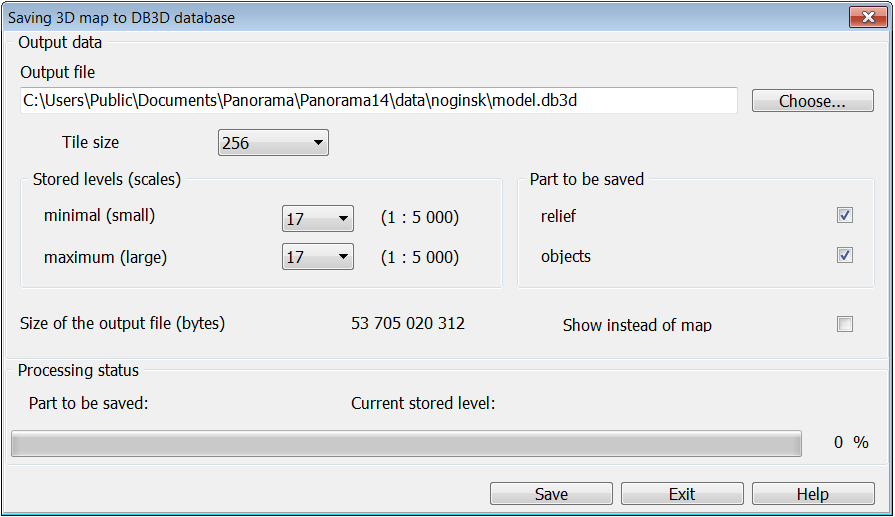
4) Use the checkboxes on the right side of the dialog to mark which part of the model you want to export to the database: relief, objects, or both parts.
5) After a choice of all parameters, you should pay attention to the information in the line «Size of the output file (byte)». It shows the approximate size of the output file in bytes, which is calculated based on the selected parameters of saving and the area of the saved model. The shown size is almost always larger than the real size of a received file, inasmuch as it does not consider compression of stored textures. But to get the desired result, it is better to check if there is the required space on the disk of your computer where the output file will be saved.
6) Press the «Save» button.
If a previously non-existent DB3D file is specified as the output one, it will be created after clicking the «Save» button, its creation will take some time. When choosing an existing database, it is checked whether there already exists in the database a model corresponding to the current region. This is determined by the model name, which is automatically generated from the full name of the file of open region. If the model already exists, then the question is asked about adding the data to the existing ones or replacing the all model data with new ones (old data are deleted). The duration of the saving process depends on the number of saved scale levels, the geographical area of the model and can take from a few seconds to tens of minutes. The process of saving data can be interrupted by pressing the «Esc» key on the keyboard directly during execution. Thus, a request about interruption of saving will be given. If you refuse, the process will continue, if the answer is yes,then all tiles that have been built will be saved to the database with the possibility of further use. After saving is completed, all its parameters in the dialog will remain unchanged until the end of the current session of the «Navigator 3D» task. If you need to save for other scale levels, another area of the region or into another base, you need to change the corresponding parameters and perform a new save.
After exporting a three-dimensional terrain model, the created database is automatically connected to use, instead of building a 3D model from the project data. Also, saving to the database provides the possibility of subsequent work with the model without using cartographic data.
|