Editing 3D image of object |


|
|
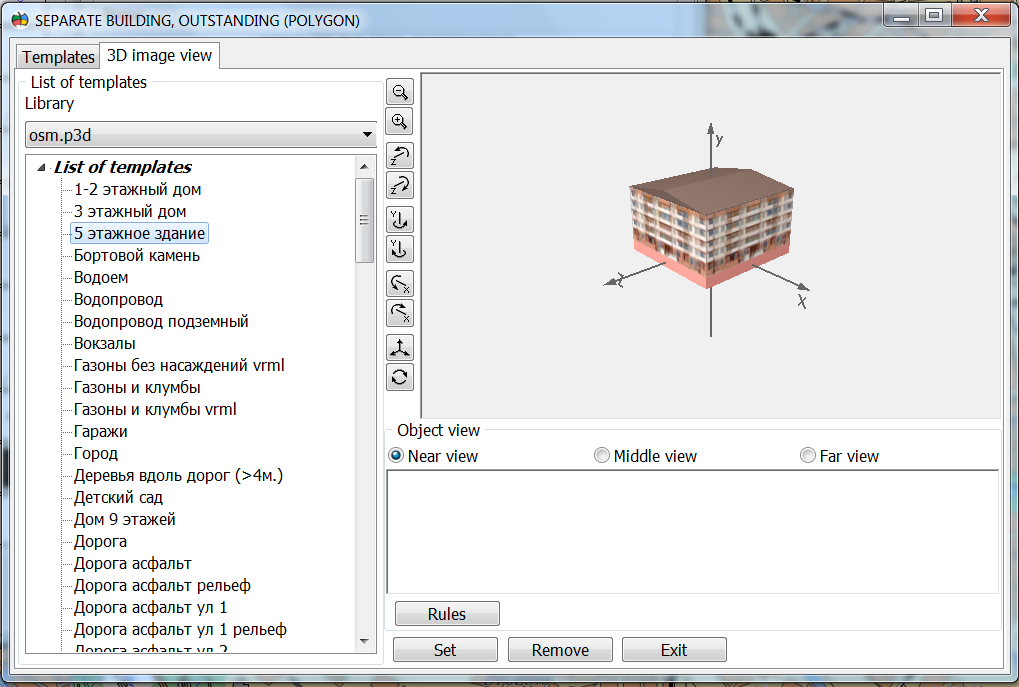
The left side of the dialog has two bookmarks the Templates and 3D image view. Depending on the chosen bookmark a functional filling the right side of dialog is changed. 3D image view bookmark contains a tree with the list of all templates of 3D-view of objects chosen of the list in the top part of the bookmark of p3d-library of three-dimensional images. At this chosen bookmark on the right side of the dialog there are shown chosen view of the object, the appointed view of object. By means of buttons it is possible to appoint or to disable the earlier appointed 3D-view for display of the chosen type of object.
In the list as the active only those templates are displayed which can be assigned to the selected type of object in conformity with its localization (polygon, line, point etc.). Templates bookmark contains a tree with the list of all templates of 3D-view of objects chosen from the list in the top part of the bookmark of p3d-library of three-dimensional images.
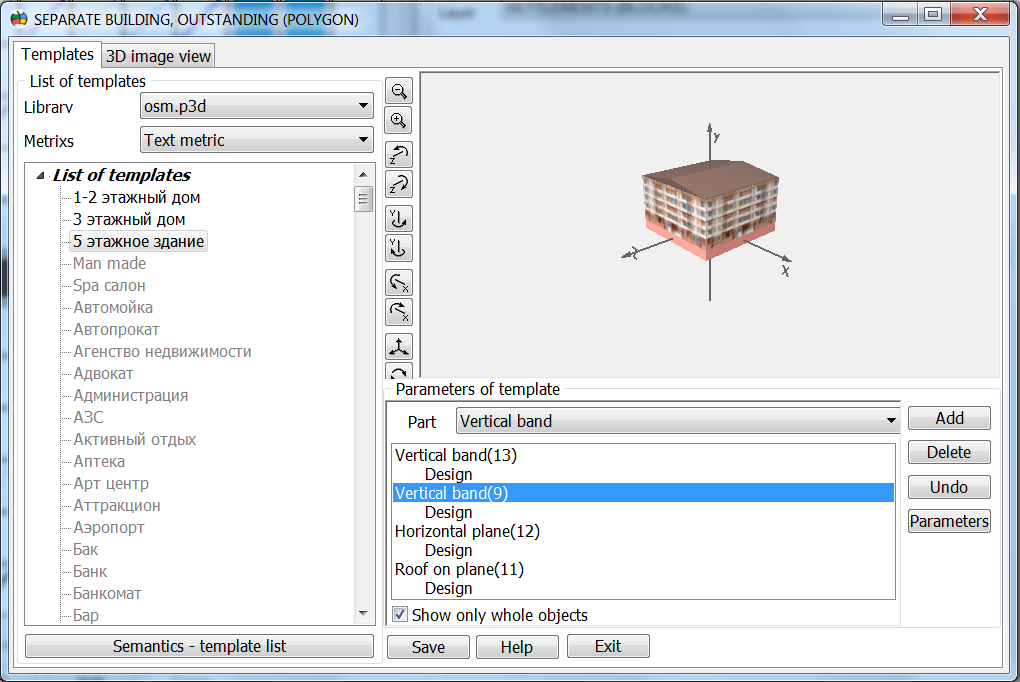
In the list as the active only those templates are displayed which correspond to the metrics chosen for editing: one-point, 2 point, many points, many points closed, text metric. Thus, in the right side the view of the currently chosen template is displayed. View of the templates metrics can be changed, thus, those templates and views of templates parts will becomes active for editing which correspond to the chosen metrics. In the tree of templates of the Templates bookmark by the right-click a pop-up menu appears by means of which items it is possible: 1) Add a new template. Adds an empty template which can be edited later on. 2) Copy a template. Copies the current active chosen template with a new name. 3) Add section. Into the tree of templates the section is added, which assembles into group several templates or subsections with their templates. 4) Add subsection. Into the tree of templates the subsection is added which assembles several templates into group. 5) Delete. It deletes a current chosen element: - template; - subsection with all its constituent templates; - section, with all its constituent subsections and templates.
In the field of the window Parameters of template it is possible to see parts of which the given template consists. To each part of the template a Description is attached. If the part contains a dot sign, then it too is placed into the list.
The template can consist of following parts: - mark; - mark by line; - plane along surface; - band along surface; - flat line; - line with given section; - cylinder lying above square; - dome; - title.
Each part of the template contains a description. The description contains information about how to display the part surface: color, surface texture and the way of it repeats, material. By double click on the Description (or by the Parameters button) a dialog appears for entering the parameters of description. You can delete the highlighted part. It is possible to choose a necessary part in the dropdown list and to add it into the image. Parts are gathered from below upwards: at first a socle, then the basic part, then a roof. By double click on a selected part, a dialogue with the required parameters appears. The view of the ready or corrected image is displayed in the window on the right. The user can increase, decrease, rotate on any axis and return the view to the initial state. Template editing can be made with use of the following buttons: Add a new part of the template chosen from the list of available one, Delete the currently chosen part of a template, change the Properties of the chosen part of a template and its description. Saving the finished template is made by the button Save. Name of the object, which user has chosen at the entrance, is placed in dialog header. At one entrance it is possible to edit or create several templates, and then, having chosen appropriated for the specified object, to assign it as a 3D object view (the near, middle or far plan) in the bookmark 3D image view of the dialogue. If it is necessary, that the several 3D views corresponded to one view of two-dimensional object, it is necessary to create semantics of the classifier with enumeration of these views. Such semantics may be created and corrected by button Semantics - template list.
|