Setting viewing of video image |


|
|
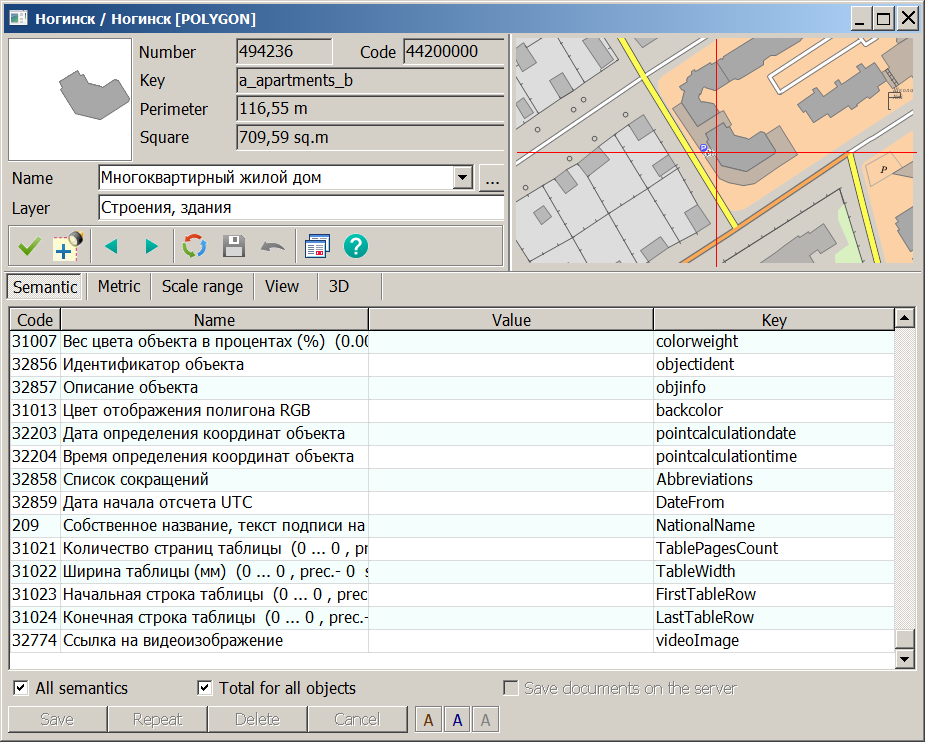
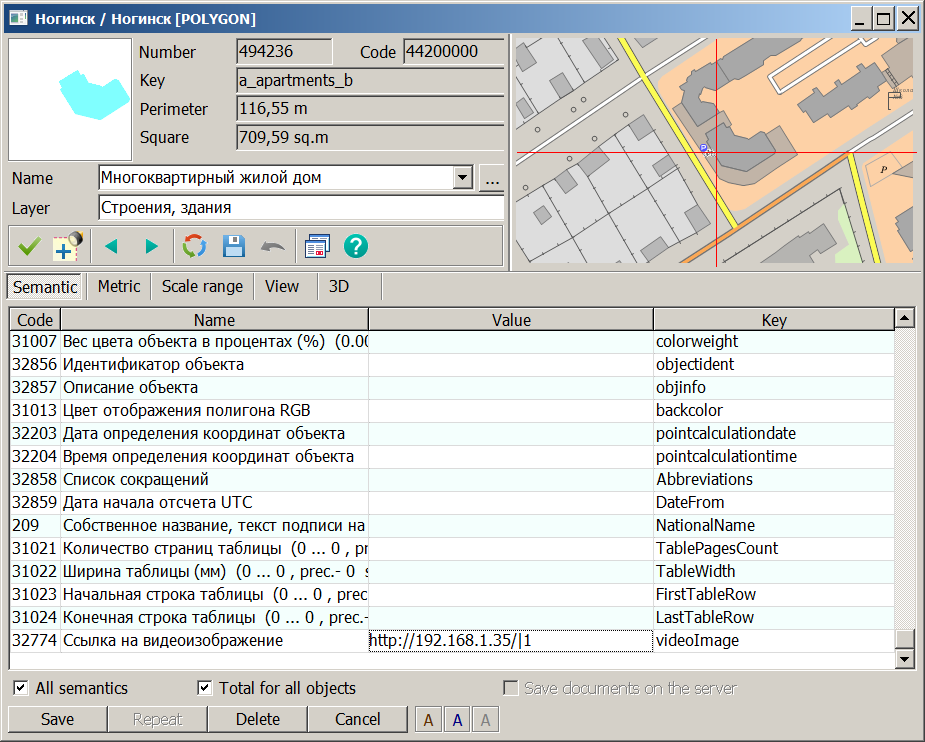
Setting up a connection to a video camera is carried out in the «Select Object» dialog On the bookmark «Semantics» you must activate the modes «All semantics» and «For all objects», choose «Link to video image" semantics for adding.
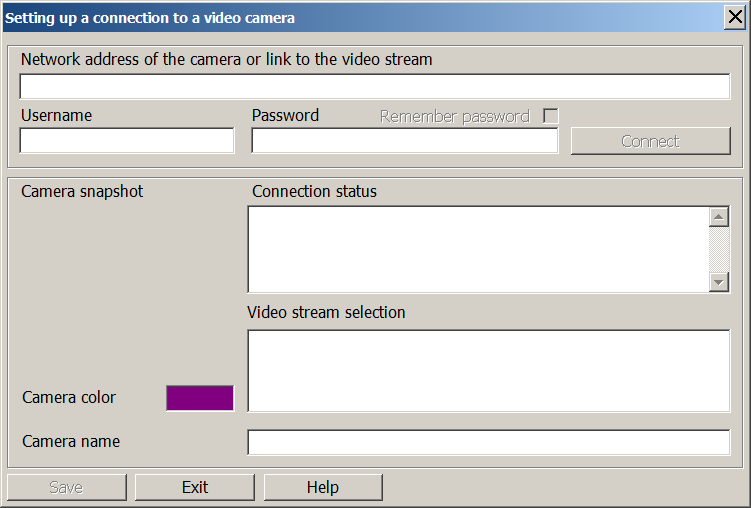
Then double-click in the «Value» field to open the «Setting up a connection to a video camera" dialog. In the dialog, enter the url-link to the video stream or the ip-address of the camera and the authorization parameters into the appropriate fields if the camera has private access. HTTP and RTSP data transfer protocols are supported.
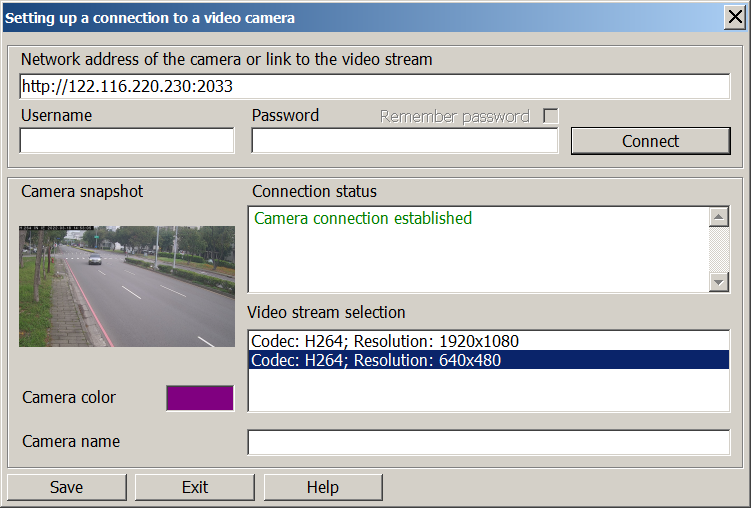
If the network address of the camera is entered in the «Network address of the camera or link to the video stream» line and the camera supports the ONVIF standard, you can check the connections to the video camera by clicking the «Connect» button. At the same time, in the dialog in the «Connection status» field, a notification about the connection to the camera will appear, the «Video stream selection» field will be filled with the parameters of the camera's permissions, in the «Camera snapshot» field, a snapshot of the current image from the camera will appear in the average or the lowest permission.
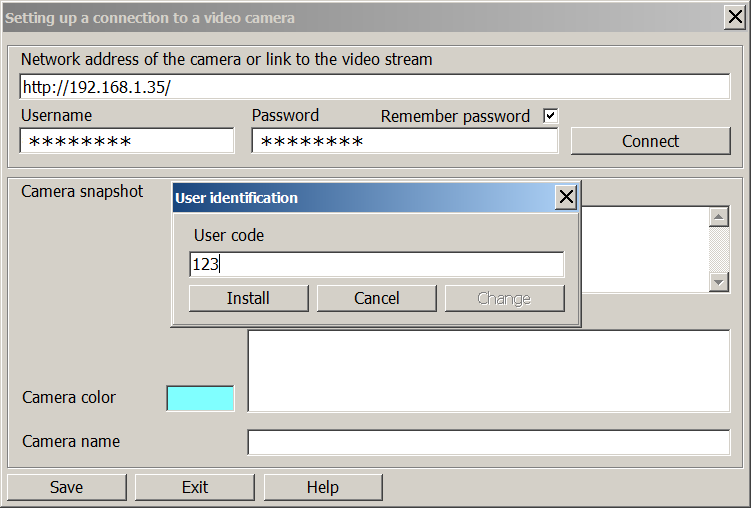
The choice of codec and permission in the «Video stream selection» field determines the permission in which the video will be played later in the video viewing window. To save the authorization parameters, if they are set, you must select the «Remember password" mode and enter the user code in the opened «User identification» dialog. The user code must be the same one for all objects with cameras for one map. It is requested once per session for one map. If you select the «Remember password» option, the authorization parameters will be saved into the configuration file of the video cameras parameters for the active map after clicking the «Save» button in the «Setting up a connection to a video camera» dialog.
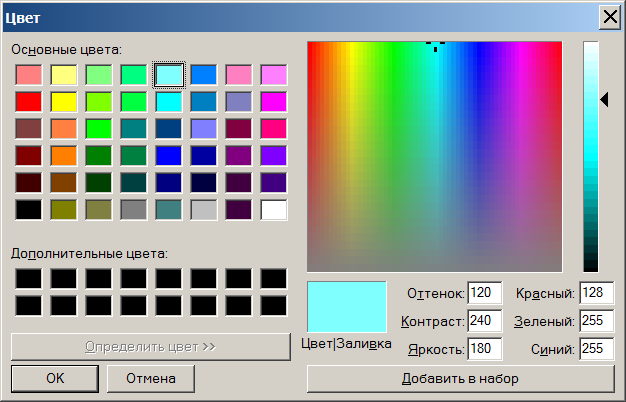
For the visual identification of the camera with the map's object on which it is located, it is necessary to assign a «Camera color» by double-clicking the mouse button in the «Camera color» field, calling the color selection dialog.
In this case, the object-camera on a map will have the color, chosen by the user, and correspond to a frame of dialog of viewing the video image. The color is stored in the «Object color RGB» semantics. In the «Camera name» field, the user can enter the name of the video camera to identify it on the map. This name will be saved in the «Name» semantics of the object to which the video camera is attached. After filling in all the parameters for connecting to a video camera, we save them into the semantics of the object by pressing the «Save» button in the «Setting up a connection to a video camera» dialog. Then we save the edited semantics of the object by pressing the save button in the «Select Object» dialog.
To view a video image, select a camera object on the map using the key combination «Ctrl+Shift+left mouse button».
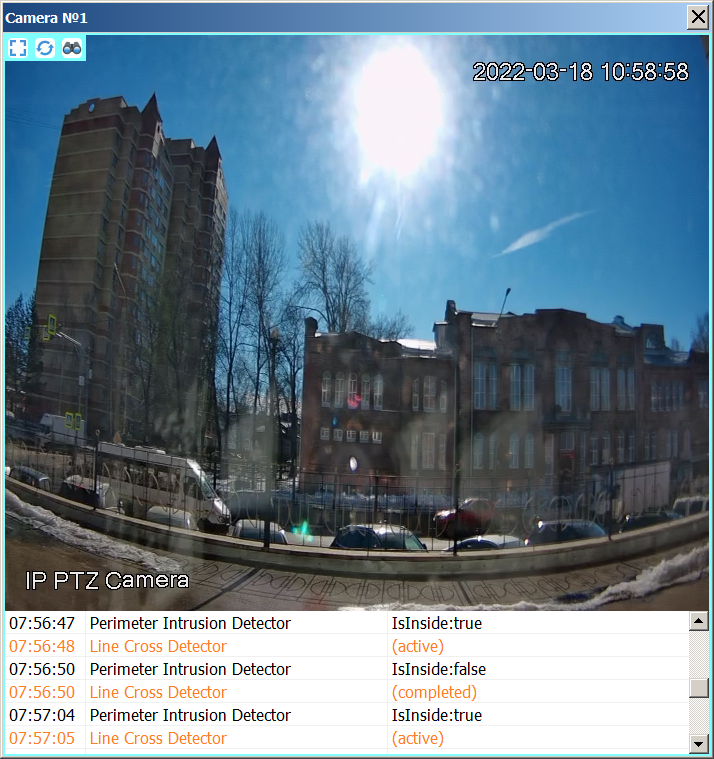
The size of the video viewing window corresponds to the resolution of the video stream. If necessary, the window can be expanded to full screen. GIS Panorama allows you to simultaneously view real-time video from different sources of video data. The text box below the video image can display event notifications from the camera if the camera is customized to display events. Events include: the movement of people, cars and other objects, the determination of the fact of crossing the perimeter of the closed zone, the appearance or disappearance of objects, the determination of the facts of vandalism and sabotage. All these actions can be tracked if the video camera supports the appropriate video analytics functions and the ONVIF standard for interaction with client programs. To manage the polling of events, the application task «Share your photos with the coordinates of the shooting» – «List of photo and video data» is used.
|
